facial_emotion_recognition__EMOJIFIER-master
所属分类:LabView编程
开发工具:DOS
文件大小:1386KB
下载次数:0
上传日期:2020-04-03 04:56:53
上 传 者:
mosawi
说明: doa program talk image recognation
文件列表:
LICENSE (1068, 2019-02-02)
config.ini (238, 2019-02-02)
dataset (0, 2019-02-02)
emoji (0, 2019-02-02)
emoji\angry.png (15905, 2019-02-02)
emoji\glass.png (472453, 2019-02-02)
emoji\kiss.png (648387, 2019-02-02)
emoji\lol.png (26683, 2019-02-02)
emoji\smile.png (230626, 2019-02-02)
emoji\tease.png (81329, 2019-02-02)
emotion_map.json (100, 2019-02-02)
images (0, 2019-02-02)
model_checkpoints (0, 2019-02-02)
requirements.txt (92, 2019-02-02)
src (0, 2019-02-02)
src\__init__.py (722, 2019-02-02)
src\data_manager.py (1757, 2019-02-02)
src\dataset_creator.py (4359, 2019-02-02)
src\face_capture.py (2474, 2019-02-02)
src\predictor.py (4746, 2019-02-02)
src\trainer.py (5000, 2019-02-02)
# facial_emotion_recognition__EMOJIFIER
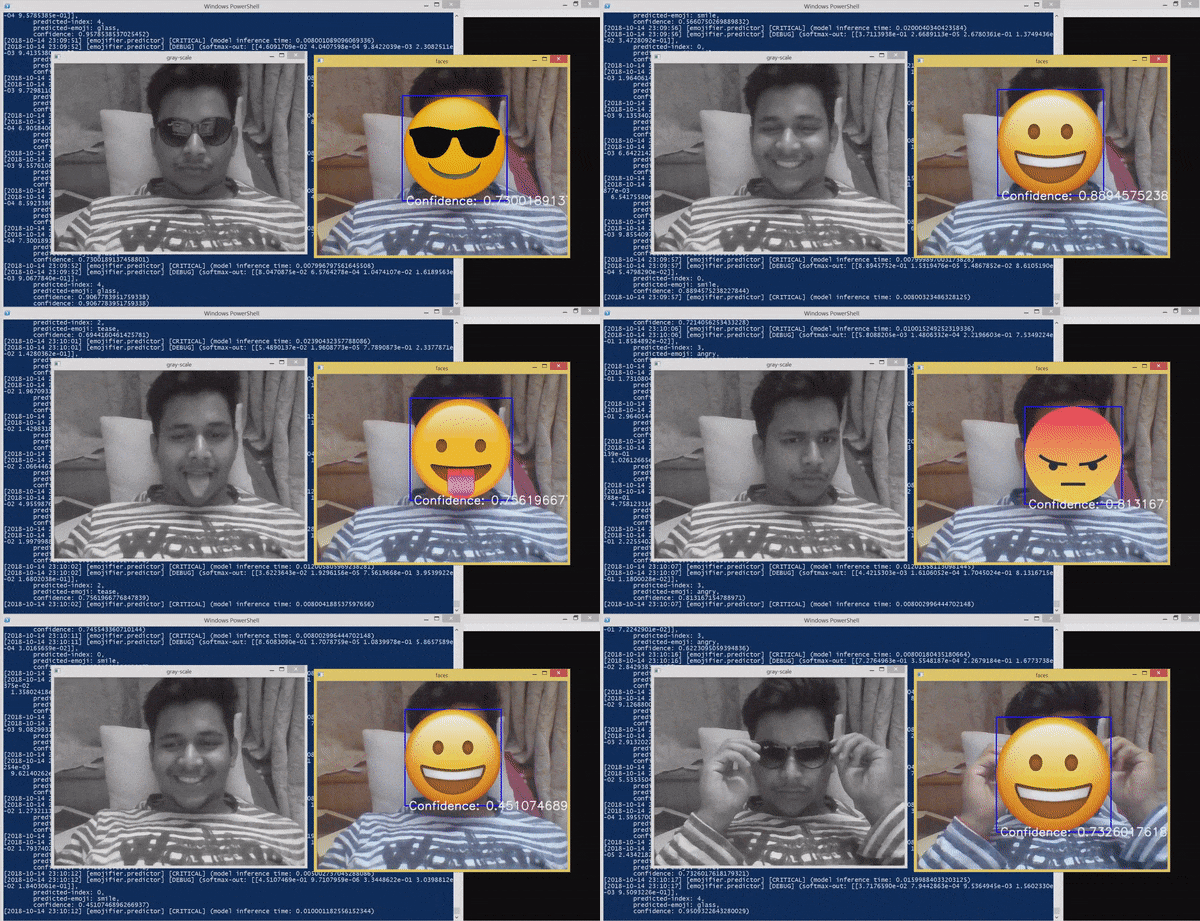
Recognizes the facial emotion and overlays emoji, equivalent to the emotion, on the persons face.
## Some results First!

## Getting Started
1. ### Get the code:
- Using SSH: `git clone git@github.com:vijuSR/facial_emotion_recognition__EMOJIFIER.git`
OR
- Using HTTP: `git clone https://github.com/vijuSR/facial_emotion_recognition__EMOJIFIER.git`
1. ### Setup the Virtual Environment (Recommended):
- Create the virtual environment
- `python3 -m venv `
- Activate your virtual-environment
- Linux: `source /bin/activate`
- Windows: `cd ` then `.\Scripts\activate`
- Install the requirements
- `cd
`
- `pip install --upgrade -I -r requirements.txt`
> #### Install any missing requirement with `pip install `
#### That's all for the setup ! :smiley:
## Making it work for you:
There are 4 steps **from nothing** (not even a single image) **to getting the result as shown above**.
> #### And you don't need anything extra than this repo.
- **STEP 0** - define your EMOTION-MAP :smile: :heart: :clap:
1. `cd `
1. Open the 'emotion_map.json'
1. Change this mapping as you desire. You need to write the "emotion-name". Don't worry for the numeric-value assigned, only requirement is they should be unique.
1. There must be a **.png** emoji image file in the '/emoji' folder for every "emotion-name" mentioned in the emotion_map.json.
1. Open the 'config.ini' file and change the path to "haarcascade_frontalface_default.xml" file path on **your system**. For example on my system it's: > "G:/VENVIRONMENT/computer_vision/Lib/site-packages/cv2/data/haarcascade_frontalface_default.xml" where > "G:/VENVIRONMENT/computer_vision" is my virtual environment path.
1. 'config.ini' contains the hyperparameters of the model. These will depend on the model and the dataset size. The default one should work fine for current model and a dataset size of around 1.2k to 3k. **IT'S HIGHLY RECOMMENDED TO PLAY AROUND WITH THEM**.
- **STEP 1** - generating the facial images
1. `cd `
1. run `python3 src/face_capture.py --emotion_name --number_of_images `
-- example: `python3 src/face_capture.py --emotion_name smile --number_of_images 200`
> This will open the cam and all you need to do is give the **smile** emotion from your face.
- **NOTE: You must change /emotion_map.json if you want another set emotions than what is already defined.**
- Do this step for all the different emotions in different lighting conditions.
- For the above result, I used 300 images for each emotions captured in 3 different light condition (100 each).
- You can see your images inside the **'images'** folder which will contain different folder for different emotion images.
- **STEP 2** - creating the dataset out of it
1. run `python3 src/dataset_creator.py`
- This will **create the ready-to-use dataset** as a python pickled file and will save it in the dataset folder.
- **STEP 3** - training the model on the dataset and saving it
1. run `python3 src/trainer.py`
- This will start the model-training and upon the training it will save the tensorflow model in the 'model-checkpoints' folder.
- It has the parameters that worked well for me, feel free to change it and explore.
- **STEP 4** - using the trained model to make prediction
1. run `python3 src/predictor.py`
- this will open the cam, and start taking the video feed -- NOW YOU HAVE DONE IT ALL. :clap:
Its time to show your emotions :heart:
> ### P.S. -- The model was trained on my facial images only, but was able to detect the expressions of my brother as well.

近期下载者:
相关文件:
收藏者: