ardynia
所属分类:虚拟/增强现实-VR/AR
开发工具:C++
文件大小:3065KB
下载次数:0
上传日期:2021-08-08 20:07:44
上 传 者:
sh-1993
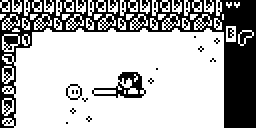
说明: 塞尔达风格的冒险游戏,为阿杜博伊设计
(An adventure game in the style of Zelda, for the Arduboy)
文件列表:
LICENSE (1890, 2021-05-13)
Makefile (550, 2021-05-13)
ardynia.ino (816, 2021-05-13)
bmptool (0, 2021-05-13)
bmptool\.prettierrc (22, 2021-05-13)
bmptool\LICENSE (1067, 2021-05-13)
bmptool\buildTileArray.js (6440, 2021-05-13)
bmptool\index.js (2505, 2021-05-13)
bmptool\package-lock.json (895, 2021-05-13)
bmptool\package.json (445, 2021-05-13)
bmptool\testKey (0, 2021-05-13)
bmptool\testKey\key_5x8.png (91, 2021-05-13)
bmptool\testPlayer (0, 2021-05-13)
bmptool\testPlayer\playerWalk_14x16.png (523, 2021-05-13)
maptool (0, 2021-05-13)
maptool\.prettierrc (22, 2021-05-13)
maptool\buildEntityArray.js (7394, 2021-05-13)
maptool\buildMapArray.js (6013, 2021-05-13)
maptool\buildTiledDungeonColorOverlay.js (1851, 2021-05-13)
maptool\index.js (2925, 2021-05-13)
maptool\node_modules (0, 2021-05-13)
maptool\node_modules\canvas (0, 2021-05-13)
maptool\node_modules\canvas\.travis.yml (431, 2021-05-13)
maptool\node_modules\canvas\.vscode (0, 2021-05-13)
maptool\node_modules\canvas\.vscode\c_cpp_properties.json (4095, 2021-05-13)
maptool\node_modules\canvas\.vscode\settings.json (165, 2021-05-13)
maptool\node_modules\canvas\History.md (18349, 2021-05-13)
maptool\node_modules\canvas\binding.gyp (4874, 2021-05-13)
maptool\node_modules\canvas\build (0, 2021-05-13)
maptool\node_modules\canvas\build\Makefile (13159, 2021-05-13)
maptool\node_modules\canvas\build\Release (0, 2021-05-13)
... ...
# Ardynia
An adventure game for the [Arduboy](http://arduboy.com)
Website for the game is at https://www.city41.games/ardynia
## How to play
see https://www.city41.games/ardynia/help
## How to build - Arduino IDE
It should build just as-is in the Arduino IDE. If not, please let me know. I have had success building the game with 1.8.5 and 1.8.6. I now use 1.8.6 for developing the game.
## How to build - Makefile
The makefile is expecting to find the Arduino IDE at `$HOME/.arduino_ide`. I followed [this blog post](https://jonblack.me/how-to-program-the-arduino-using-vim/) to set it all up.
I am building the game on Ubuntu. I also suspect Mac OSX would work fine. No idea about Windows.
If all is setup correctly, then `make` will build the game, and `make clean` deletes the build artifacts. There is also `make emu` to launch the game in ProjectABE, but that is specific to my machine and unlikely to work for anyone else (TODO, fix this)
## Generating Assets
There are three tools in the repo for generating the various assets for the games. These tools are all written in JavaScript and require node to run. If you have a recent version of node installed (I am using v8.9.4), then you should be able to just invoke these tools via the makefile:
* `make map`: generate `src/overworld.h` and `src/dungeons.h` from the Tiled data (see below)
* `make bmp`: generate `src/tileBitmaps.h` and `src/spriteBitmaps.h` from the pngs in `tilePngs` and `spritePngs`
* `make strings`: generates `src/strings.h` from `strings.json`
After changing any assets, the resulting C++ `.h` files should be checked into the repo.
### Maps
The maps for the game are built using the [Tiled Map Editor](https://www.mapeditor.org/). If you load `tiled/overworld.tmx` and/or `tiled/dungeons.tmx` into Tiled, it should just work. Each map has three layers:
* **guidelines:** this layer is read only and just drops in Rectangles that are the size of the rooms. This helps to see where the room boundaries are.
* **entities:** all of the game's enemies, chests, switches, etc are defined in this layer. More on entities below
* **Tile Layer 1:** this layer contains the actual map tiles. With this layer selected, you should be able to grab a tile from the tileset and "paint" with it.
#### Generating map data for the game
After making any needed changes to one of the map files, save it, then export it to `tiled/overworld.json` or `tiled/dungeons.json`. Once exported run `make map`.
#### How to add entities to a map
See the existing entities in the map for reference. All of the available entity types are defined in `src/entityTypes.h`. For example, if you want to add a blob to a room:
1. with the entities layer selected, choose the "insert point" tool, and click where you want the blob.
2. from the Properties panel in Tiled, set the name to something descriptive (anything you want) and the type to `BLOB`.
Entities can also sport various custom properties depending on the entity and goal of the room. This custom property is stored in the top 3 bits of the entity, so it can have a max value of 7.
* `CONTAINED_TYPE`: used by `POT` and `CHEST`. This should be a string type set to another entity type, such as `KEY`. See the existing pots or chests for reference. Only entities with value 7or less can be used.
* `DEST_ROOM_X` and `DEST_ROOM_Y`: used by `TELEPORTER`. These are how the player goes from the overworld to a dungeon, and vice versa. These are integer values and are the x/y coordinates of a room. For example, on the overworld, the TELEPORTER for dungeon one goes to `(0,7)`, and if you look on dungeons.tmx, you'll see the room at `(0,7)` is the first room of dungeon 1. There can only be a total of 8 teleporters per map.
* `MISC`: this is one of these string values:
* `VERTICAL`: used for `TRIGGER_DOOR` to tell the door to lay it self out vertically instead of horizontally. This is needed if the trigger door is on a east or west wall.
* `SLAM_SHUT`: can be placed on any entity that otherwise would not use its top 3 bits (for example, you can't set SLAM_SHUT on a chest, as it would wipe out `CONTAINED_TYPE`. If this is set, that room will have the TRIGGER_DOORs shut once the player enters. The player must defeat all the enemies for the doors to open again.
* `LAST_ENEMY_HAS_KEY`: if set, then once the player defeats all the enemies in the room a chest will appear containing a key
* `LAST_ENEMY_HAS_HEART_CONTAINER`: same as above, but chest will have a heart container
* `LAST_ENEMY_HAS_BOSS_KEY`: again, but this time chest has the boss key
* `THREE_SWITCHES_ONE_BOOMERANG`: sets the room up to be a puzzle involving switches and the player's boomerang. Despite its name, any number of switches can be set. The player must trip all of the switches with a single boomerang throw, and when they do a chest with a key in it will appear.
* `OPEN_CHESTS_IN_RIGHT_ORDER`: a puzzle involving chests. Place several chests in the room, the player must open them in order. If they do, they get a key. If they don't, they get shocked and take damage. You can change the order of the chests by dragging them around in Tiled.
* `LAST_TORCH_OPENS_DOORS`: a puzzle involving the magic ring. Once the player lights all the torches in the room, the trigger doors will open.
NOTE: if you just want a room to only be the chest puzzle, just drop a SUNKEN_BRIDGE in the room and set OPEN_CHESTS_IN_RIGHT_ORDER on the sunken bridge. The bridge will never appear to the player. Otherwise, usually set the puzzle flag on a blob or a bat.
#### Changing the size of the maps
If the maps change size, these constants need to be updated, at the top of `src/game.h`
* OVERWORLD_WIDTH_IN_ROOMS
* OVERWORLD_HEIGHT_IN_ROOMS
* DUNGEONS_WIDTH_IN_ROOMS
### Graphics
The graphics for Ardynia are custom generated to work with `src/drawBitmap.cpp`. This is a different draw bitmap function from what is found in Arduboy2 or ArdBitmap. The main difference is for `plus mask` mode, the entire masks are interlaced between the frames. Arduboy2 interlaces mask bytes with frame bytes instead. `make bmp` will generate the proper sprite data to feed to `src/drawBitmap`.
#### spritePngs
poorly named, these are really graphics that need a mask. The resulting variable name will be `_plus_mask`.
#### tilePngs
poorly named, these are graphics that don't need a mask. The resulting variable name will be `_tiles`
Some things that really are sprites are found in tilePngs, such as explosion. This is to save bytes by only generating masks when they are really needed.
### Strings
Edit the strings `strings.json` then run `make strings`. The resulting `src/strings.h` will have arrays in it suited for rendering with `Renderer#drawString`
## Gotchas
* The code is pretty bad in some areas, my apologies. I figured this game out as I went. Also sometimes hard to follow/read code is chosen due to byte savings.
## Still TODO
Hopefully nothing. The game is finished. But always the chance of a bug cropping up.
近期下载者:
相关文件:
收藏者: