iot-hub-c-raspberrypi-client-app
所属分类:物联网
开发工具:C
文件大小:17KB
下载次数:0
上传日期:2021-06-16 20:01:59
上 传 者:
sh-1993
说明: 应用程序从BME280传感器收集天气数据并将其发送到物联网中心,还根据云采取行动-...
(Application collects weather data from a BME280 sensor and sends it to IoT hub, also take actions according to cloud-to-device message, device management.)
文件列表:
.travis.yml (303, 2021-06-17)
CMakeLists.txt (996, 2021-06-17)
LICENSE (1183, 2021-06-17)
bme280.c (12897, 2021-06-17)
bme280.h (2211, 2021-06-17)
config.h (295, 2021-06-17)
main.c (11058, 2021-06-17)
setup.sh (1952, 2021-06-17)
telemetry.c (7983, 2021-06-17)
telemetry.h (879, 2021-06-17)
wiring.c (2474, 2021-06-17)
wiring.h (584, 2021-06-17)
---
services: iot-hub
platforms: C
author: shizn
---
# IoT Hub Raspberry Pi 3 Client application
[](https://travis-ci.com/Azure-Samples/iot-hub-c-raspberrypi-client-app)
> This repo contains the source code to help you get started with Azure IoT using the Microsoft IoT Pack for Raspberry Pi 3 Starter Kit. You will find the [full tutorial on Docs.microsoft.com](https://docs.microsoft.com/en-us/azure/iot-hub/iot-hub-raspberry-pi-kit-c-get-started).
This repo contains an arduino application that runs on Raspberry Pi 3 with a BME280 temperature&humidity sensor, and then sends these data to your IoT hub. At the same time, this application receives Cloud-to-Device messages from your IoT hub, and takes actions according to the C2D command.
## Set up your Pi
### Enable SSH on your Pi
Follow [this page](https://www.raspberrypi.org/documentation/remote-access/ssh/) to enable SSH on your Pi.
### Enable SPI on your Pi
Follow [this page](https://www.raspberrypi.org/documentation/configuration/raspi-config.md) to enable SPI on your Pi
## Connect your sensor with your Pi
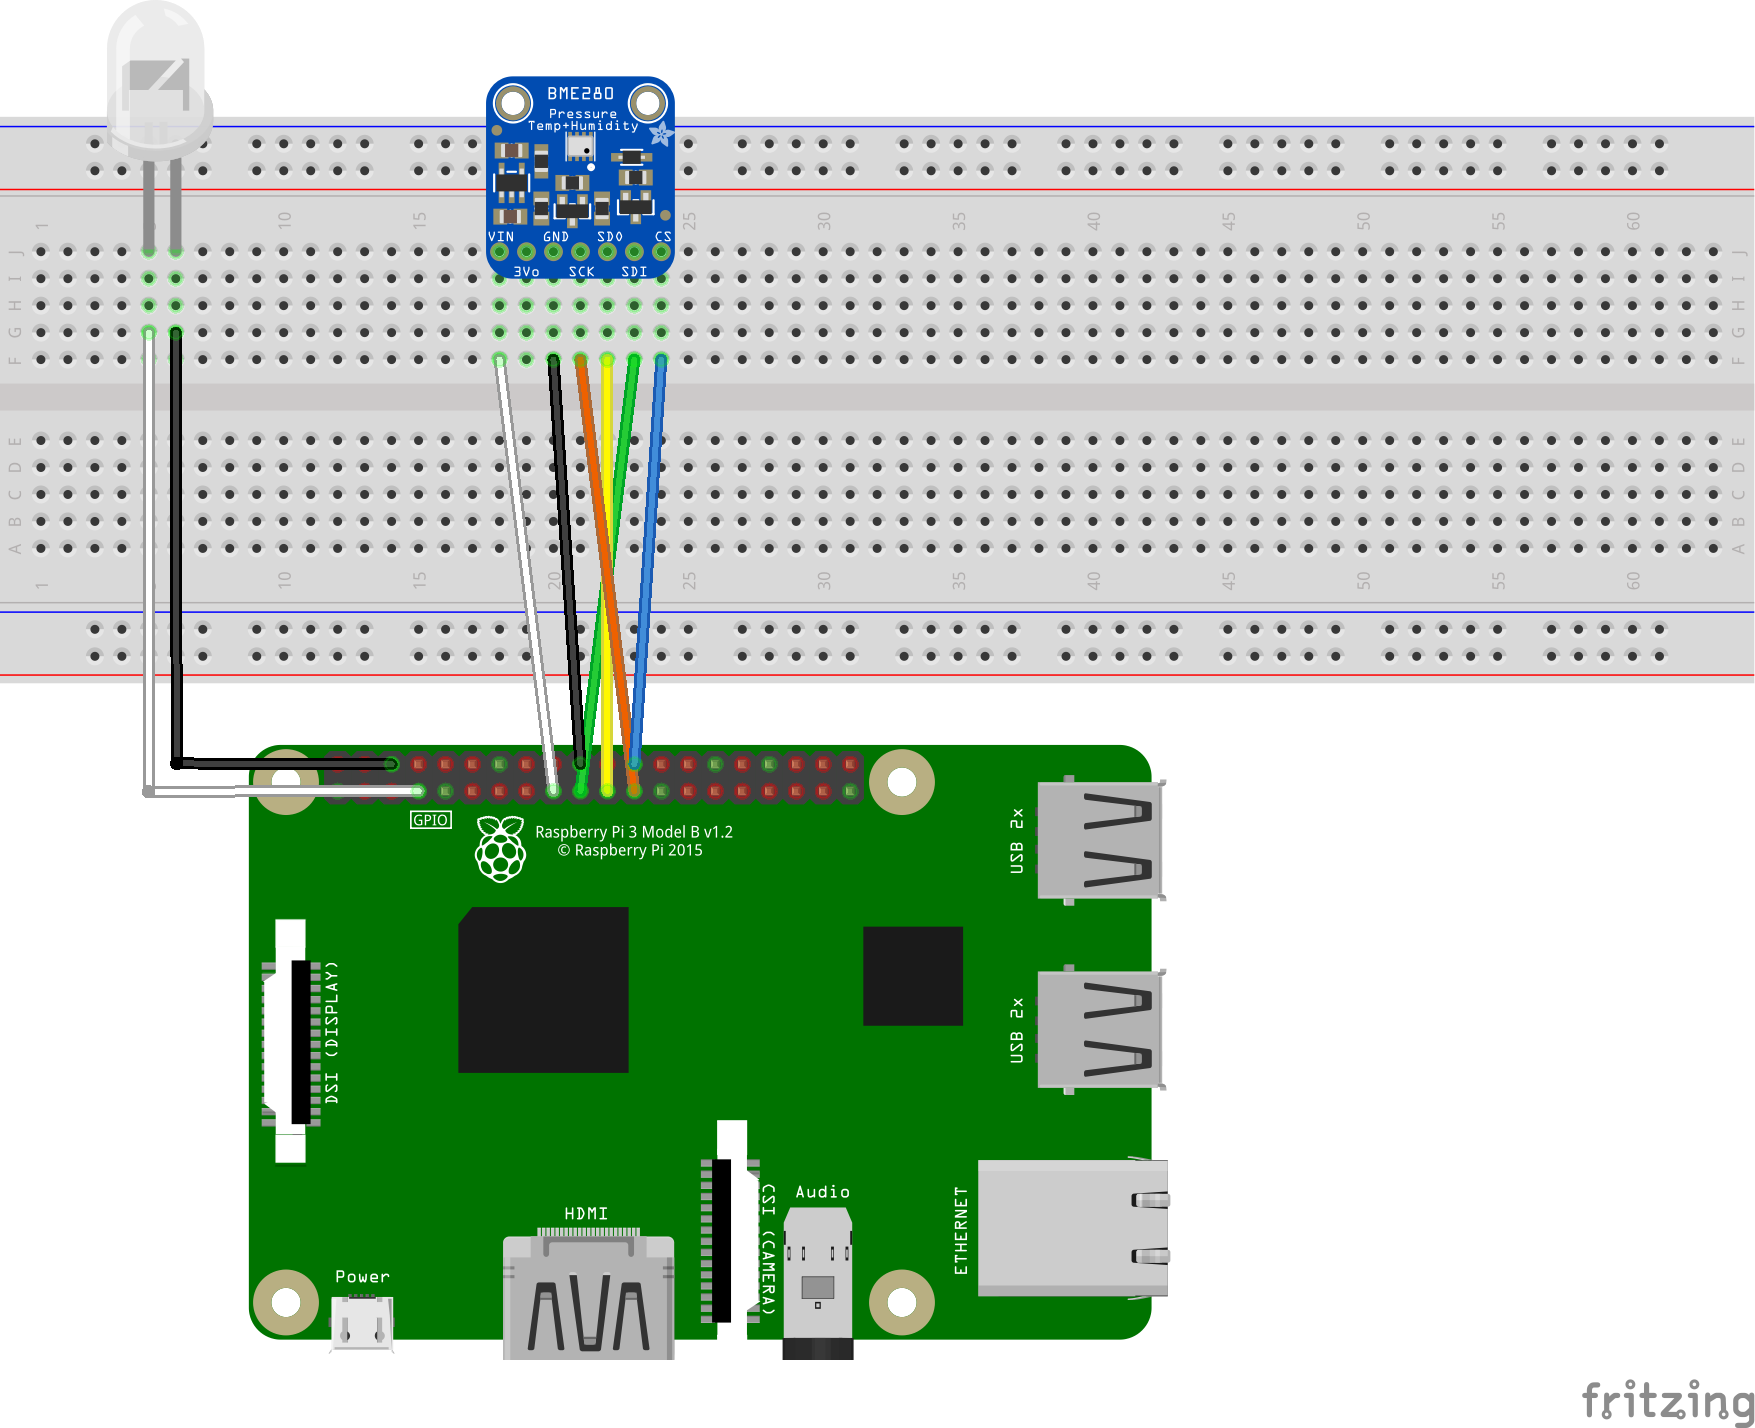
### Connect with a physical BEM280 sensor and LED
You can follow the image to connect your BME280 and a LED with your Raspberry Pi 3.
## Download and setup the client app
1. Clone the client application to local:
```bash
sudo apt-get install git-core
git clone https://github.com/Azure-Samples/iot-hub-c-raspberrypi-client-app.git
```
2. Run setup script:
```bash
cd ./iot-hub-c-raspberrypi-client-app
sudo chmod u+x setup.sh
sudo ./setup.sh
```
**If you don't have a physical BME280, you can use '--simulated-data' as command line parameter to simulate temperature&humidity data.**
```bash
sudo ./setup.sh --simulated-data
```
## Run your client application
Run the client application with root priviledge, and you also need provide your Azure IoT hub device connection string, note your connection should be quoted in the command.
```bash
sudo ./app ''
```
### Send Cloud-to-Device command
You can send a C2D message to your device. You can see the device prints out the message and blinks once when receiving the message.
### Send Device Method command
You can send `start` or `stop` device method command to your Pi to start/stop sending message to your IoT hub.
近期下载者:
相关文件:
收藏者: