wx-client
所属分类:建站系统
开发工具:Vue
文件大小:112KB
下载次数:0
上传日期:2023-04-28 07:51:14
上 传 者:
sh-1993
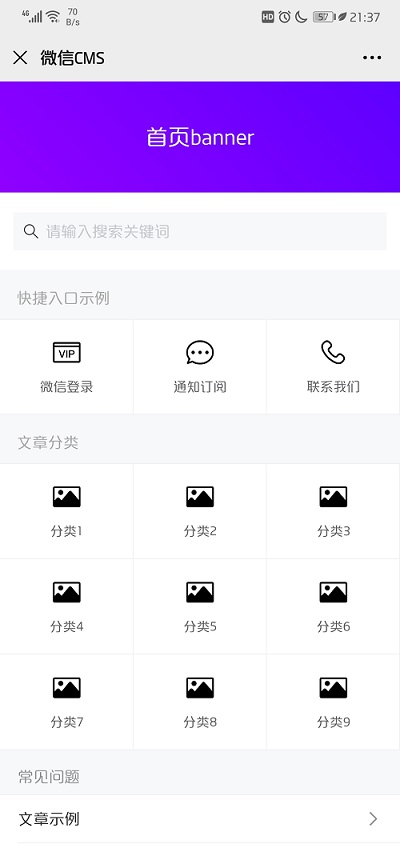
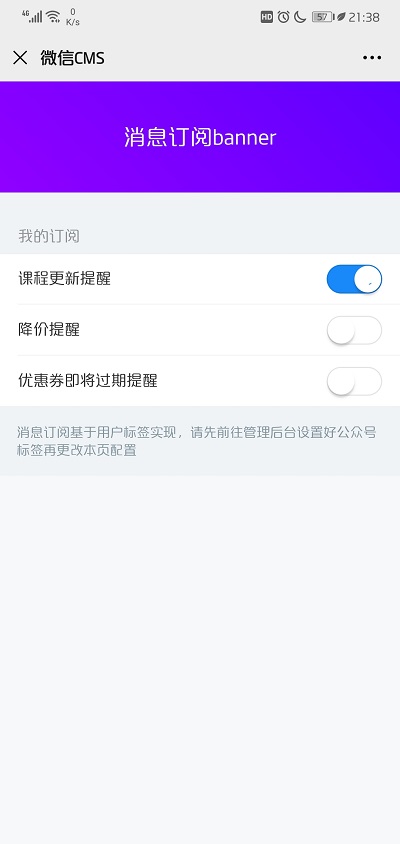
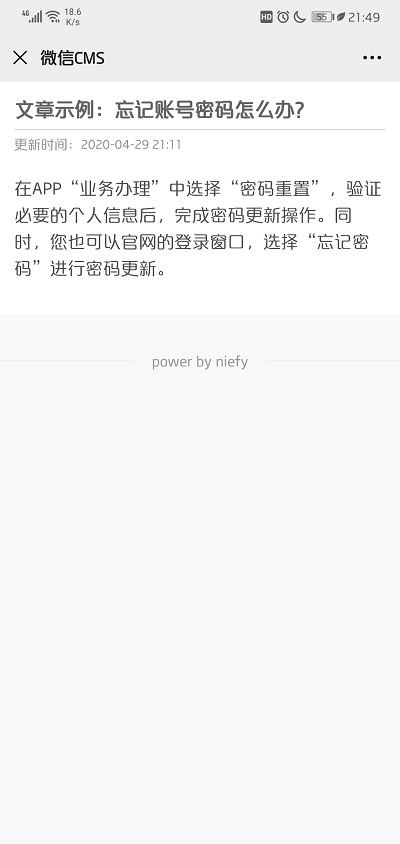
说明: 微信公众号接口wx-api前端示例项目,包含微信登录、微信分享、CMS文章示例功能
(WeChat public account interface wx api front-end example project, including WeChat login, WeChat sharing, CMS article example functions)
文件列表:
.editorconfig (151, 2023-04-28)
.env.development (155, 2023-04-28)
.env.production (137, 2023-04-28)
LICENSE (11357, 2023-04-28)
babel.config.js (53, 2023-04-28)
package-lock.json (383939, 2023-04-28)
package.json (499, 2023-04-28)
public (0, 2023-04-28)
public\index.html (1430, 2023-04-28)
src (0, 2023-04-28)
src\App.vue (435, 2023-04-28)
src\components (0, 2023-04-28)
src\components\FollowModal.vue (639, 2023-04-28)
src\components\SearchBar.vue (720, 2023-04-28)
src\js (0, 2023-04-28)
src\js\cookie.js (1009, 2023-04-28)
src\js\request.js (728, 2023-04-28)
src\js\wxAuth.js (1397, 2023-04-28)
src\js\wxShare.js (2432, 2023-04-28)
src\main.js (360, 2023-04-28)
src\pages (0, 2023-04-28)
src\pages\Article.vue (2323, 2023-04-28)
src\pages\Home.vue (1541, 2023-04-28)
src\pages\NotFound.vue (87, 2023-04-28)
src\pages\QuestionCategory.vue (2660, 2023-04-28)
src\pages\QuestionSearch.vue (2119, 2023-04-28)
src\pages\Subscribe.vue (4642, 2023-04-28)
src\pages\WxLogin.vue (619, 2023-04-28)
src\router.js (1127, 2023-04-28)
src\style (0, 2023-04-28)
src\style\article.css (1442, 2023-04-28)
src\style\common.css (8554, 2023-04-28)
vue.config.js (574, 2023-04-28)
# wx-client
微信公众号接口[wx-api](https://github.com/niefy/wx-api)前端项目,包含微信登录、微信分享、CMS文章示例功能
## 开发环境
- node.js
## 启动步骤
1. 启动[wx-api](https://github.com/niefy/wx-api)项目,具体流程参考对应项目介绍
2. 安装依赖
``` bash
npm install
```
3. 修改.env.development开发环境配置文件
4. 编译构建
``` bash
# 开发环境
npm run serve
# 生产环境
npm run build
```
5. 浏览器打开如下地址:
- 首页:http://localhost:8080
## 体验微信分享、微信授权登录等功能
由于微信分享和微信登录功能需在正式域名下使用,有如下两种方式体验
### 方式一:部署到生产环境再看
生产环境建议打包后将文件部署到nginx,后端请求使用nginx转发功能
nginx.conf配置
```
location /wx/ { #转发后端接口
proxy_pass http://127.0.0.1:8088/wx/;
}
```
### 方式二:使用ngrok穿透到内网
然后配置ngrok映射到nginx端口:http://xxx.ngrok.io -> http://localhost:8080
```
ngrok http 8080
```
### 不管哪种方式都需要检查如下配置:
- 公众号/测试号后台:接口配置是否成功
- 公众号/测试号后台:JS接口安全域名,只填域名,不要带协议及URL,如:xxx.ngrok.io
- 公众号/测试号后台:网页授权回调域名,只填域名,不要带协议及URL,如:xxx.ngrok.io
然后可以微信访问开发环境页面或者使用微信开发者工具打开
- 文章(微信分享)示例:http://xxx.ngrok.io/client/article/1
- 微信登录示例:http://xxx.ngrok.io/client/wxLogin
## 截图

## 生产环境如何部署(需先部署wx-api)
1. 配置wx-client目录下.env.production文件
2. 编译打包:npm run build
3. 将打包后的dist目录内文件上传到服务器nginx的资源目录(默认目录名是html)
4. 修改nginx.conf配置,将/wx/ 请求转发到wx-api生产环境接口地址
5. 域名映射到nginx所在服务器,前往微信公众号后台配置做开发配置
近期下载者:
相关文件:
收藏者: