Pv-router
说明: Wifi PV路由器,与Domoticz配合使用,用于外部调光器,
(Wifi PV Router working with Domoticz and for external dimmer,)
(Wifi PV Router working with Domoticz and for external dimmer,)
文件列表:
LICENSE (11323, 2022-03-10)
Lua script/ (0, 2022-03-10)
Lua script/Domoticz_pvrouter_script.lua.txt (2391, 2022-03-10)
Lua script/dimmer_heater.lua.txt (715, 2022-03-10)
documentation.pdf (1240515, 2022-03-10)
pv-routeur.ino.d1_mini.bin (448544, 2022-03-10)
pv-routeur/ (0, 2022-03-10)
pv-routeur/data/ (0, 2022-03-10)
pv-routeur/data/all.min.css (55751, 2022-03-10)
pv-routeur/data/config.html (17279, 2022-03-10)
pv-routeur/data/config.json (373, 2022-03-10)
pv-routeur/data/doc.txt (3528, 2022-03-10)
pv-routeur/data/fa-solid-900.woff2 (75440, 2022-03-10)
pv-routeur/data/favicon.ico (2238, 2022-03-10)
pv-routeur/data/index.html (17735, 2022-03-10)
pv-routeur/data/sb-admin-2.js (1492, 2022-03-10)
pv-routeur/data/sb-admin-2.min.css (197981, 2022-03-10)
pv-routeur/domoticz.h (1103, 2022-03-10)
pv-routeur/images.h (3534, 2022-03-10)
pv-routeur/pv-routeur.ino (43861, 2022-03-10)
spiffs.img (1048576, 2022-03-10)
# Pv router V2.7
[](https://nodesource.com/products/nsolid)
I created this pv router to separate the power part of the analysis part.
I wanted to be able to trace the information to domoticz and leave him the processing of information
to redispatch the surplus power to different digital dimmer.
 # Prerequiement :
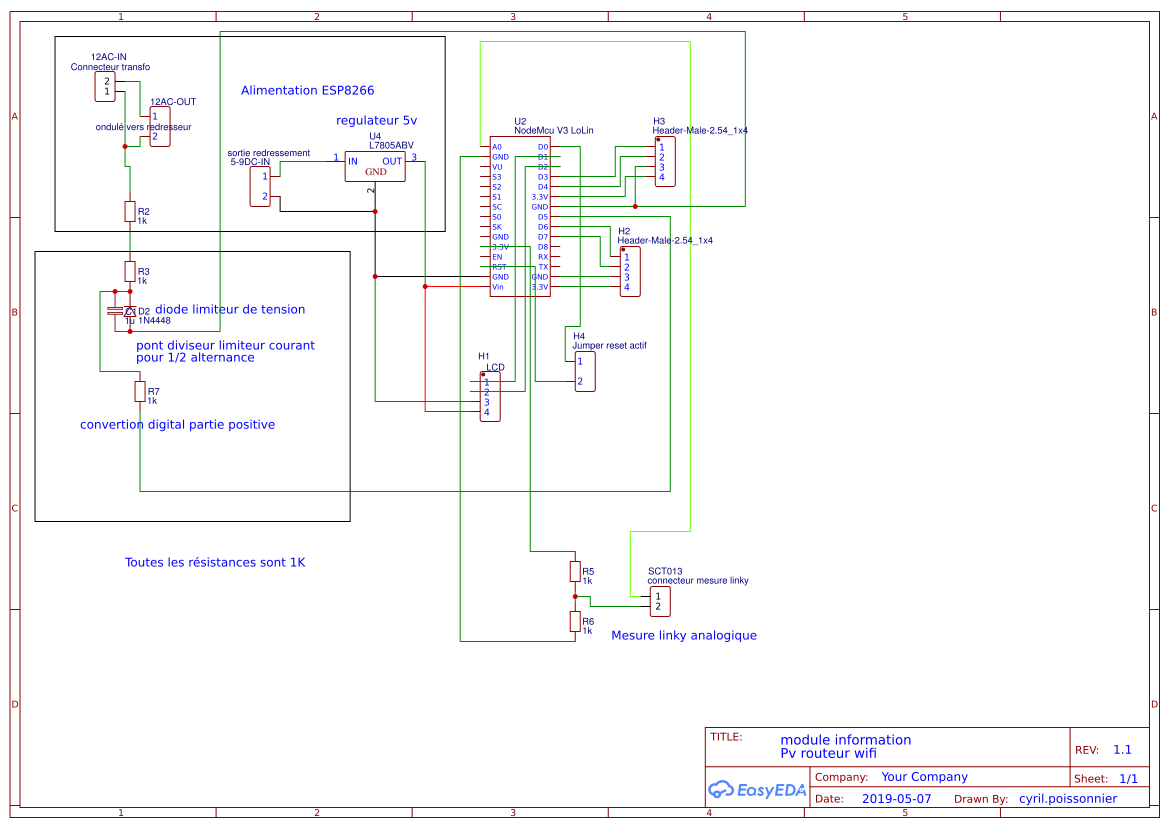
A circuit board has been created and is available ( tips )
# Prerequiement :
A circuit board has been created and is available ( tips )

 # the necessary components are:
- An ESP8266 ( Nodemcu or Wemos )
- 1 SCT013
# the necessary components are:
- An ESP8266 ( Nodemcu or Wemos )
- 1 SCT013
 - 1k resistors,
- a LED ( 3V ) ,
- a capacitor 150nf polypropylene ,
- a 5v regulator,
- connectors,
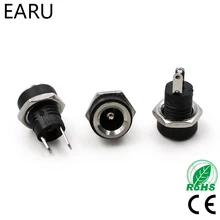
- a femelle Jack
- 1k resistors,
- a LED ( 3V ) ,
- a capacitor 150nf polypropylene ,
- a 5v regulator,
- connectors,
- a femelle Jack
 - a 12V connector
 - an oled Display
 - and a recovery transformer.
# preparing power:
Open the transformer and remove the diode bridge ( do not broke it )
- and a recovery transformer.
# preparing power:
Open the transformer and remove the diode bridge ( do not broke it )
 plug the bridge at 12AC-out and 5-10DC-IN
 plug 12V connector at 12AC - IN
and female connector to SCT013 on board
plug 12V connector at 12AC - IN
and female connector to SCT013 on board
 Connect the Oled Display on the connector on board ( OLED )
# Use :
change nothing on the program, make only modification on data/config.json if needed or upload the 2 bin files ( code and spiffs )
upload the program on the esp8266 and connect to the new wifi network ( password for OTA can be add on file data/config.json ) put information on your personal Wifi and reconnect.
the pv routeur will send information on your Domoticz server.
on the Oled display, the IP is on screen.
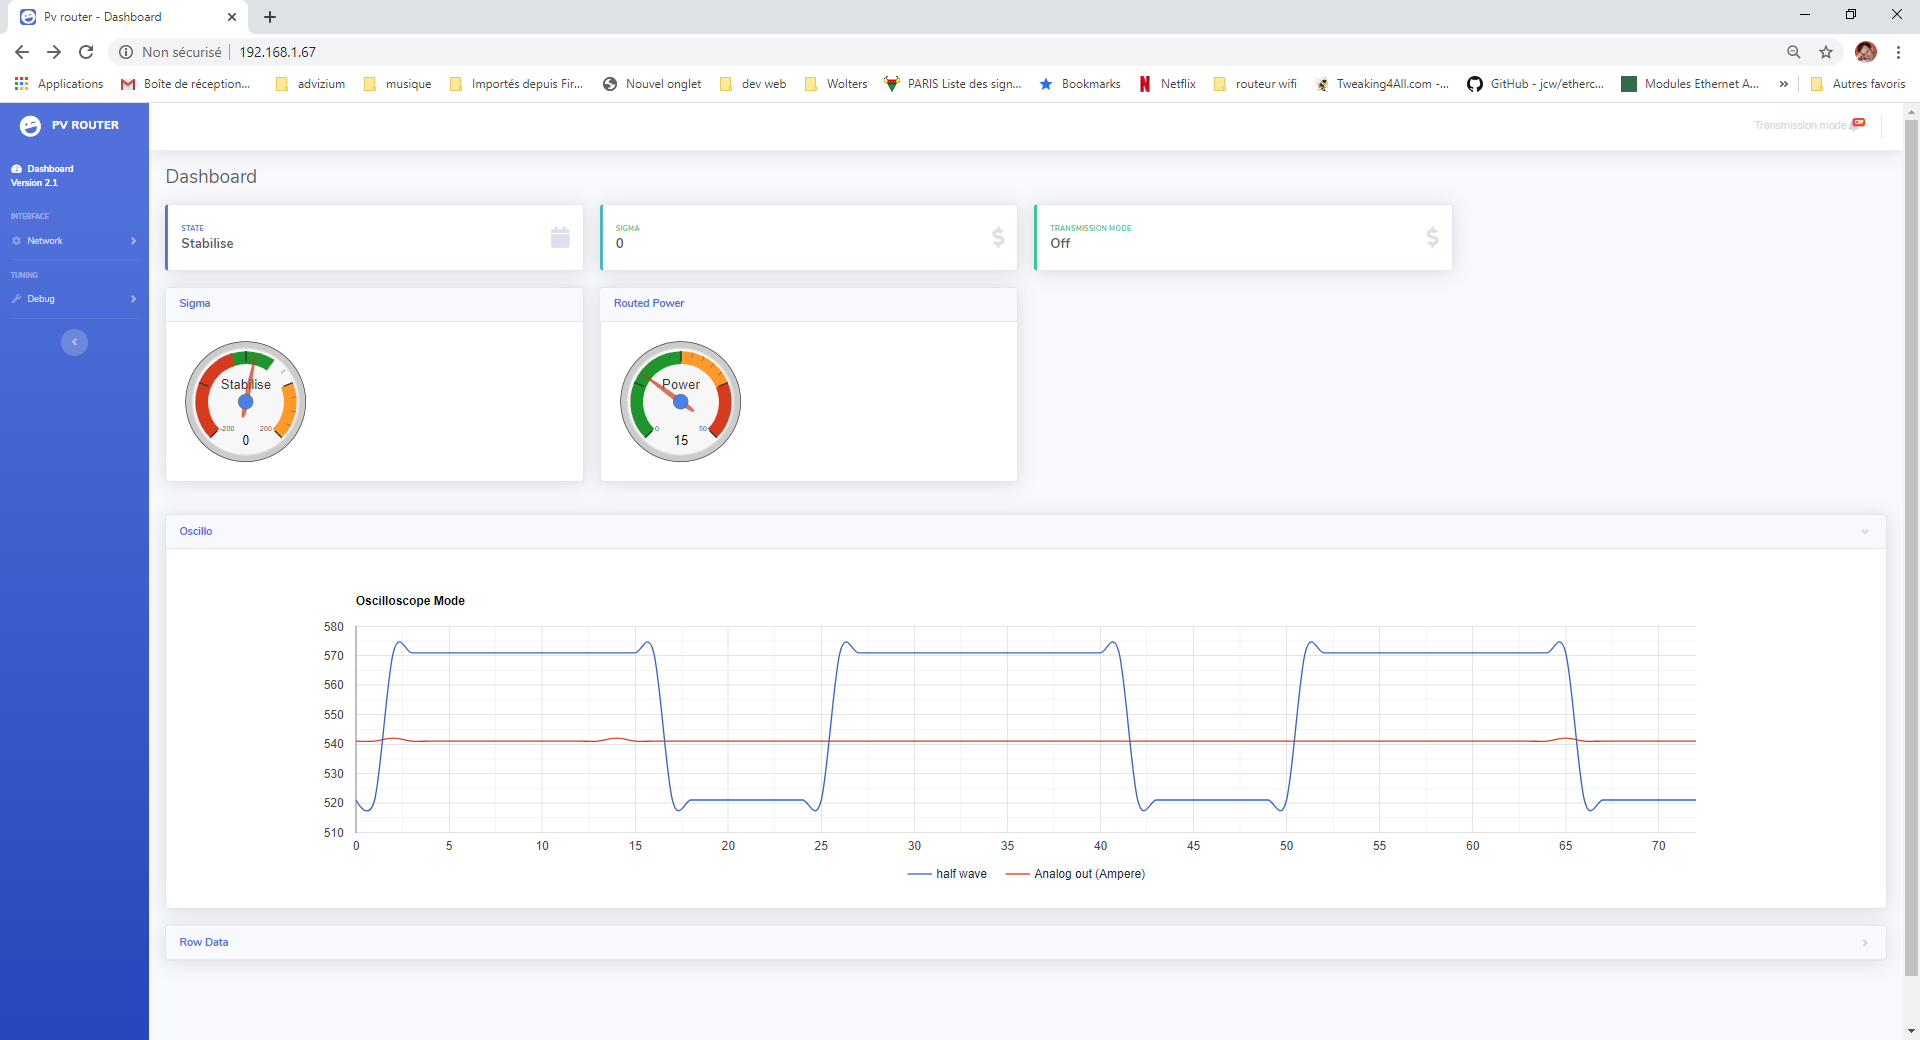
you can use web explorer for seen mesures and tune your pv router,
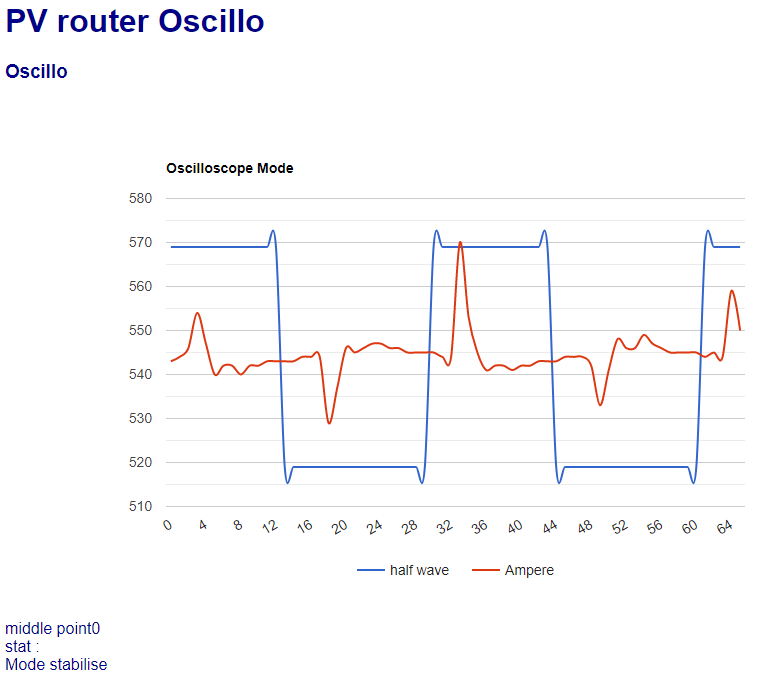
the oscilloscope mode is on
by default, send to domotic server is off ( for test ) you can activate it on the web page and don't miss to save /get?save the configuration
Connect the Oled Display on the connector on board ( OLED )
# Use :
change nothing on the program, make only modification on data/config.json if needed or upload the 2 bin files ( code and spiffs )
upload the program on the esp8266 and connect to the new wifi network ( password for OTA can be add on file data/config.json ) put information on your personal Wifi and reconnect.
the pv routeur will send information on your Domoticz server.
on the Oled display, the IP is on screen.
you can use web explorer for seen mesures and tune your pv router,
the oscilloscope mode is on
by default, send to domotic server is off ( for test ) you can activate it on the web page and don't miss to save /get?save the configuration
 # Domoticz regulation
Dimmer_heater.lua is configuration file for send to the dimmer.
Domoticz_pvrouter_script.lua is the main file for sending to the digital dimmer.
put them in domoticz/scripts/lua folder on your raspberry.
configure the config.json file for activate domoticz mode ( "UseDomoticz":true )
#autonome mode
configure the config.json file for activate autonome mode ( "autonome":true ) and change the server IP
the program will try to equilibrate power in the external numeric dimmer ( https://github.com/xlyric/Domoticz-control-with-esp8266-for-Robotdyn-AC-Light-dimmer-Module)
the full documentation is in the file Documentation.pdf ( in French )
bin files are added for easy installation.
python ~/esptool.py --port /dev/ttyUSB4 --baud 115200 write_flash 0x00000 file.bin
and for SPIFFS python ~/esptool.py --port /dev/ttyUSB4 --baud 115200 write_flash 0x200000 file.bin
and for windows :
esptool.py --port com3 --baud 256000 write_flash 0x00000 pvrouter.nodemcu.bin
esptool.py --port com3 --baud 256000 write_flash 0x00200000 spiffs.img
Wifiautoconnect password : pvrouter
OTA update
https://steve.fi/Hardware/ota-upload/
https://github.com/esp8266/Arduino/blob/master/tools/espota.py
python espota.py -d -i 10.0.0.106 -f file.bin
Special commands
exemple :
Ip:/get&cosphi=11
"send"; /// paramettre de retour sendmode
"cycle"; /// paramettre de retour cycle
"readtime"; /// paramettre de retour readtime
"cosphi"; /// paramettre de retour cosphi
"save"; /// paramettre de retour cosphi
"dimmer"; /// paramettre de retour cosphi
"server"; /// paramettre de retour server domotique
"idx"; /// paramettre de retour idx
"idxdimmer"; /// paramettre de retour idx
"port"; /// paramettre de retour port server domotique
"delta"; /// paramettre retour delta
"deltaneg"; /// paramettre retour deltaneg
"fuse"; /// paramettre retour fusible numérique
"apiKey"; /// paramettre de retour apiKey
"servermode"; /// paramettre de retour activation de mode server
"POWER"; /// paramettre de retour activation de mode server
"facteur"; /// paramettre retour delta
"tmax"; /// paramettre retour delta
"mqttserver"; /// paramettre retour mqttserver
BETA :
/cosphi find up point
/puissance indicate power of charge
# Domoticz regulation
Dimmer_heater.lua is configuration file for send to the dimmer.
Domoticz_pvrouter_script.lua is the main file for sending to the digital dimmer.
put them in domoticz/scripts/lua folder on your raspberry.
configure the config.json file for activate domoticz mode ( "UseDomoticz":true )
#autonome mode
configure the config.json file for activate autonome mode ( "autonome":true ) and change the server IP
the program will try to equilibrate power in the external numeric dimmer ( https://github.com/xlyric/Domoticz-control-with-esp8266-for-Robotdyn-AC-Light-dimmer-Module)
the full documentation is in the file Documentation.pdf ( in French )
bin files are added for easy installation.
python ~/esptool.py --port /dev/ttyUSB4 --baud 115200 write_flash 0x00000 file.bin
and for SPIFFS python ~/esptool.py --port /dev/ttyUSB4 --baud 115200 write_flash 0x200000 file.bin
and for windows :
esptool.py --port com3 --baud 256000 write_flash 0x00000 pvrouter.nodemcu.bin
esptool.py --port com3 --baud 256000 write_flash 0x00200000 spiffs.img
Wifiautoconnect password : pvrouter
OTA update
https://steve.fi/Hardware/ota-upload/
https://github.com/esp8266/Arduino/blob/master/tools/espota.py
python espota.py -d -i 10.0.0.106 -f file.bin
Special commands
exemple :
Ip:/get&cosphi=11
"send"; /// paramettre de retour sendmode
"cycle"; /// paramettre de retour cycle
"readtime"; /// paramettre de retour readtime
"cosphi"; /// paramettre de retour cosphi
"save"; /// paramettre de retour cosphi
"dimmer"; /// paramettre de retour cosphi
"server"; /// paramettre de retour server domotique
"idx"; /// paramettre de retour idx
"idxdimmer"; /// paramettre de retour idx
"port"; /// paramettre de retour port server domotique
"delta"; /// paramettre retour delta
"deltaneg"; /// paramettre retour deltaneg
"fuse"; /// paramettre retour fusible numérique
"apiKey"; /// paramettre de retour apiKey
"servermode"; /// paramettre de retour activation de mode server
"POWER"; /// paramettre de retour activation de mode server
"facteur"; /// paramettre retour delta
"tmax"; /// paramettre retour delta
"mqttserver"; /// paramettre retour mqttserver
BETA :
/cosphi find up point
/puissance indicate power of charge
# Prerequiement :
A circuit board has been created and is available ( tips )
# the necessary components are:
- An ESP8266 ( Nodemcu or Wemos )
- 1 SCT013
- a 12V connector
- an oled Display
- and a recovery transformer.
# preparing power:
Open the transformer and remove the diode bridge ( do not broke it )
plug the bridge at 12AC-out and 5-10DC-IN
plug 12V connector at 12AC - IN
and female connector to SCT013 on board
Connect the Oled Display on the connector on board ( OLED )
# Use :
change nothing on the program, make only modification on data/config.json if needed or upload the 2 bin files ( code and spiffs )
upload the program on the esp8266 and connect to the new wifi network ( password for OTA can be add on file data/config.json ) put information on your personal Wifi and reconnect.
the pv routeur will send information on your Domoticz server.
on the Oled display, the IP is on screen.
you can use web explorer for seen mesures and tune your pv router,
the oscilloscope mode is on
by default, send to domotic server is off ( for test ) you can activate it on the web page and don't miss to save /get?save the configuration
# Domoticz regulation
Dimmer_heater.lua is configuration file for send to the dimmer.
Domoticz_pvrouter_script.lua is the main file for sending to the digital dimmer.
put them in domoticz/scripts/lua folder on your raspberry.
configure the config.json file for activate domoticz mode ( "UseDomoticz":true )
#autonome mode
configure the config.json file for activate autonome mode ( "autonome":true ) and change the server IP
the program will try to equilibrate power in the external numeric dimmer ( https://github.com/xlyric/Domoticz-control-with-esp8266-for-Robotdyn-AC-Light-dimmer-Module)
the full documentation is in the file Documentation.pdf ( in French )
bin files are added for easy installation.
python ~/esptool.py --port /dev/ttyUSB4 --baud 115200 write_flash 0x00000 file.bin
and for SPIFFS python ~/esptool.py --port /dev/ttyUSB4 --baud 115200 write_flash 0x200000 file.bin
and for windows :
esptool.py --port com3 --baud 256000 write_flash 0x00000 pvrouter.nodemcu.bin
esptool.py --port com3 --baud 256000 write_flash 0x00200000 spiffs.img
Wifiautoconnect password : pvrouter
OTA update
https://steve.fi/Hardware/ota-upload/
https://github.com/esp8266/Arduino/blob/master/tools/espota.py
python espota.py -d -i 10.0.0.106 -f file.bin
Special commands
exemple :
Ip:/get&cosphi=11
"send"; /// paramettre de retour sendmode
"cycle"; /// paramettre de retour cycle
"readtime"; /// paramettre de retour readtime
"cosphi"; /// paramettre de retour cosphi
"save"; /// paramettre de retour cosphi
"dimmer"; /// paramettre de retour cosphi
"server"; /// paramettre de retour server domotique
"idx"; /// paramettre de retour idx
"idxdimmer"; /// paramettre de retour idx
"port"; /// paramettre de retour port server domotique
"delta"; /// paramettre retour delta
"deltaneg"; /// paramettre retour deltaneg
"fuse"; /// paramettre retour fusible numérique
"apiKey"; /// paramettre de retour apiKey
"servermode"; /// paramettre de retour activation de mode server
"POWER"; /// paramettre de retour activation de mode server
"facteur"; /// paramettre retour delta
"tmax"; /// paramettre retour delta
"mqttserver"; /// paramettre retour mqttserver
BETA :
/cosphi find up point
/puissance indicate power of charge
近期下载者:
相关文件:
收藏者: