plc
说明: 可编程逻辑控制器,,
(plc,,)
(plc,,)
文件列表:
.dockerignore (26, 2023-12-29)
.env (87, 2023-12-29)
.eslintrc.json (271, 2023-12-29)
.prettierrc (25, 2023-12-29)
.vscode/ (0, 2023-12-29)
.vscode/extensions.json (274, 2023-12-29)
.vscode/settings.json (1478, 2023-12-29)
Dockerfile (367, 2023-12-29)
app.yaml (381, 2023-12-29)
bins/ (0, 2023-12-29)
bins/firmware.bin (952416, 2023-12-29)
bins/littlefs.bin (2686976, 2023-12-29)
bins/partitions.bin (3072, 2023-12-29)
build/ (0, 2023-12-29)
build/.cmake/ (0, 2023-12-29)
build/.cmake/api/ (0, 2023-12-29)
build/.cmake/api/v1/ (0, 2023-12-29)
build/.cmake/api/v1/query/ (0, 2023-12-29)
build/.cmake/api/v1/query/client-vscode/ (0, 2023-12-29)
build/.cmake/api/v1/query/client-vscode/query.json (144, 2023-12-29)
build/CMakeCache.txt (3316, 2023-12-29)
build/CMakeFiles/ (0, 2023-12-29)
build/CMakeFiles/3.23.1/ (0, 2023-12-29)
build/CMakeFiles/3.23.1/CMakeSystem.cmake (380, 2023-12-29)
build/CMakeFiles/CMakeOutput.log (44, 2023-12-29)
build/CMakeFiles/cmake.check_cache (85, 2023-12-29)
create_flash_image.md (81, 2023-12-29)
index.mjs (8226, 2023-12-29)
package-lock.json (667445, 2023-12-29)
package.json (2205, 2023-12-29)
partition.csv (217, 2023-12-29)
platformio.ini (962, 2023-12-29)
public/ (0, 2023-12-29)
public/canvas.js (79051, 2023-12-29)
public/enums.mjs (1260, 2023-12-29)
public/favicon.ico (118940, 2023-12-29)
public/index.html (7695, 2023-12-29)
public/link.mjs (708, 2023-12-29)
... ...
# Conucon PLC: IoT Function Block Diagram with Web Interface
Conucon PLC uses a specific graphical programming (noditron) for creating IoT function block diagrams with a web interface. This platform utilizes the PLC (programmable logic controller) concept to create a user-friendly interface for building IoT projects.
With Conucon PLC, you can create complex IoT projects with ease. The platform is user-friendly and requires no prior programming experience.
## Installation
To get started with Conucon PLC, follow these steps:
1. Download 3 binary files from [/bins](https://github.com/nodi-andy/plc/tree/master/bins). Those are partitions.bin, firmware.bin and littlefs.bin
1. Go to the Adafruits online ESPTools: https://adafruit.github.io/Adafruit_WebSerial_ESPTool/
1. Click on "Choose a file.." and select partitions.bin. Do not change the Offset
1. Click on the next "Choose a file.." button and select firmware.bin. Enter the offset as "Ox10000" (10k)
1. Repeat the same for littlefs.bin. Enter the offset as "Ox170000" (170k)
1. Click on "Program" and reset after done.
1. Now you can find "noditron" in the wifi search
## Compilation
To build conucon PLC, follow these steps:
1. Clone the repository from GitHub ``git clone https://github.com/nodi-andy/plc``
1. Install platformIO
1. Select `esp32doit-devkit-v1` > `Platform` > `Upload Filesystem image` from the PlatformIO menu.
1. Select `esp32doit-devkit-v1` > `General` > `Upload and Monitor` from the PlatformIO menu.
1. Connect to the wifi "noditron"
1. Type 192.168.4.1 in your browser
## Server image
1. Run `npm run debug` to start debugging
1. Run `npm run build` create file system image
1. Select `esp32doit-devkit-v1` > `Platform` > `Upload Filesystem image` from the PlatformIO menu.
You should now see the home screen with the toolbox:
 ## Adding blocks
To add your first block:
1. Select the `basic/toggle` from menu bar. The block will appear
1. Right-click on it and select the menu `properties` > `port`
1. Set the value on 2 (default LED on esp32)
1. Set the LED value by clicking on toggle
1. Write the code into esp32 by middle mouse button
1. Based on toggle state, the LED will go on or off after code sent using middle button
## Adding blocks
To add your first block:
1. Select the `basic/toggle` from menu bar. The block will appear
1. Right-click on it and select the menu `properties` > `port`
1. Set the value on 2 (default LED on esp32)
1. Set the LED value by clicking on toggle
1. Write the code into esp32 by middle mouse button
1. Based on toggle state, the LED will go on or off after code sent using middle button
 ## Connecting the blocks
1. Create a button (`widget/button`) using the same method as before.
1. Set the port of the button on `0` in the same menu described above
1. Port `0` is connected to the default button on esp32
1. Connect the output of button in the function block diagram to the input of toggle
1. This will overwrite the toggle default value and the toggle will take the value of button
1. Write the code using middle mouse button. Note that one button on the esp32 board is the reset/boot button; press the other button.
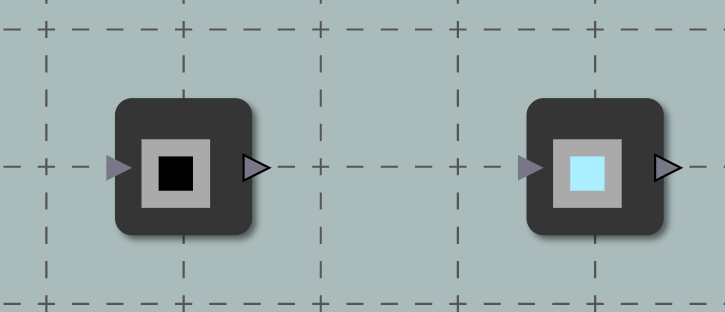
1. The on-board LED will go on and off after you press and release the button.
The following image shows the result:
## Connecting the blocks
1. Create a button (`widget/button`) using the same method as before.
1. Set the port of the button on `0` in the same menu described above
1. Port `0` is connected to the default button on esp32
1. Connect the output of button in the function block diagram to the input of toggle
1. This will overwrite the toggle default value and the toggle will take the value of button
1. Write the code using middle mouse button. Note that one button on the esp32 board is the reset/boot button; press the other button.
1. The on-board LED will go on and off after you press and release the button.
The following image shows the result:
 ## Create a logic circuit
1. Add a AND gate (logic/and) and another button
1. Assign the port number of the new button (e.g. 19). Note that this port shall be available as input port
1. Create following circuit
1. Connect a simple button between the new port (e.g.19) and GND:
## Create a logic circuit
1. Add a AND gate (logic/and) and another button
1. Assign the port number of the new button (e.g. 19). Note that this port shall be available as input port
1. Create following circuit
1. Connect a simple button between the new port (e.g.19) and GND:
 Pressing the on-board button and the new button will turn the led on. There is no need for additional hardware.
Create complex circuit using other logic blocks
Pressing the on-board button and the new button will turn the led on. There is no need for additional hardware.
Create complex circuit using other logic blocks

## Adding blocks
To add your first block:
1. Select the `basic/toggle` from menu bar. The block will appear
1. Right-click on it and select the menu `properties` > `port`
1. Set the value on 2 (default LED on esp32)
1. Set the LED value by clicking on toggle
1. Write the code into esp32 by middle mouse button
1. Based on toggle state, the LED will go on or off after code sent using middle button
## Connecting the blocks
1. Create a button (`widget/button`) using the same method as before.
1. Set the port of the button on `0` in the same menu described above
1. Port `0` is connected to the default button on esp32
1. Connect the output of button in the function block diagram to the input of toggle
1. This will overwrite the toggle default value and the toggle will take the value of button
1. Write the code using middle mouse button. Note that one button on the esp32 board is the reset/boot button; press the other button.
1. The on-board LED will go on and off after you press and release the button.
The following image shows the result:
## Create a logic circuit
1. Add a AND gate (logic/and) and another button
1. Assign the port number of the new button (e.g. 19). Note that this port shall be available as input port
1. Create following circuit
1. Connect a simple button between the new port (e.g.19) and GND:
Pressing the on-board button and the new button will turn the led on. There is no need for additional hardware.
Create complex circuit using other logic blocks
近期下载者:
相关文件:
收藏者: